Landscaping a yard with slopes, hills, or graded areas brings unique challenges. The steeper angles make planting difficult, while the gravity causes rapid erosion, drainage issues, and vulnerability to weed takeover. Simply seeding grass on sloped areas often leads to disappointment, as the seed and topsoil washes away readily with rain before seeds can even germinate.
But properly laying high-quality sod provides an elegant, effective solution for establishing lush lawns even on difficult slopes and angles. The instant soil stabilization, greenery, and rapid rooting sod offers transforms the aesthetics and functionality of a sloping yard better than any other planting method.
In this complete guide, you’ll learn the art and science behind successfully installing sod on slopes and hills of all angles:
- The advantages sod offers over seed and other planting methods on steep grades
- How to thoroughly prepare the underlying soil before laying sod
- Choosing the ideal sod variety for maximum slope performance
- Step-by-step instructions for proper sod laying techniques from start to finish
- Caring for new sod in those critical first weeks after installation
- Preventing and troubleshooting common problems with new sod on slopes
- Viable alternatives if sod truly isn’t feasible for a site
Follow these best practices for properly laying and establishing sod on even significant slopes, and you’ll be rewarded with a stunning, polished lawn that thrives beautifully on steep hills and angles. Let’s get into the specifics so you can get your slopes looking their absolute best!
Why Use Sod Over Seed or Other Plantings on Sloped Yards?
Sod costs substantially more upfront compared to buying grass seed, which leads some homeowners to try seeding on slopes to save money. But this often proves to be a costly mistake when the seed washes away in the first good soaking rain.
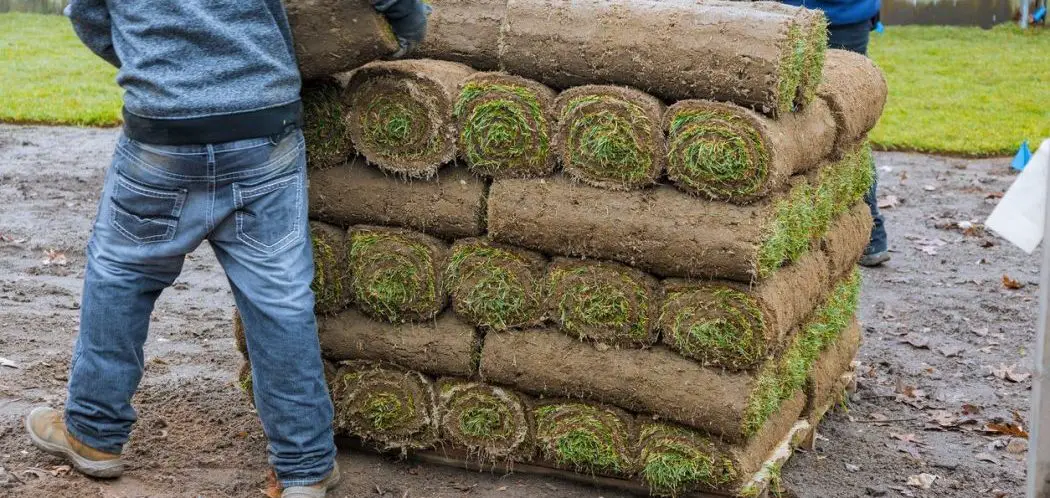
Unlike seed, sod offers immediate stabilization and protection. The thick mat of established grass blades and roots secures the soil against erosion and slippage on steep angles in a way no other planting method can match.
Here are the key advantages quality sod provides on hilly terrain compared to grass seed or other plantings:
Erosion control – Sod’s dense matrix of roots and rhizomes holds soil tightly in place, preventing the heavy erosion and washouts seed or bare soil experiences on hills.
Instant greening and aesthetics – Whereas seed takes weeks to months to grow in, sod offers immediate transformation of ugly dirt into an attractive green lawn.
Faster water absorption – Sod’s established root systems retain more water before runoff compared to bare soil. This aids its survival and reduces drainage challenges on slopes.
Weed resistance – Mature sod gaps offer fewer opportunities for invasive weeds to take hold compared to slow-growing seeded lawns.
Wider planting window – Sod can be laid spring, summer, or fall as long as the ground isn’t frozen. Seed is far more limited by germination temperature ranges and rainfall requirements.
Durability and traffic tolerance – Sod withstands activity and use sooner than delicate seedlings that are easily damaged while establishing.
When you weigh all these advantages, it’s easy to understand why sod is so well suited for the drainage, growth, and maintenance challenges inherent to sloped terrain. When budget allows, absolutely choose quality sod over seeding on hilly or sloped areas for vastly better results.
Preparing the Slope Site for High-Performance Sod Installation
Laying sod on a poorly prepared slope is asking for failure. Taking the time upfront to ready the soil and site sets your sod up for maximum rooting, durability, and aesthetic success.
Don’t skip these important steps when prepping a slope for sod:
Clear Decorative Rocks or Other Landscape Elements
Remove any existing decorative rock, gravel, mulch, pavers, or other landscaping elements from the slope area before laying sod. These not only impede direct soil contact, but also make grading and achieving smooth transitions difficult.
You can re-install decorative elements around the completed sod installation once the sod has rooted if desired.
Test and Amend Soil Nutrients and pH
Test the native soil pH and key nutrient levels like phosphorous, potassium, and nitrogen. Sod establishment and long-term health depends on balanced, fertile soil.
Correct any serious deficiencies by adding soil amendments and fertilizers prior to sodding. It’s much more difficult to improve the soil later from beneath already laid sod.
Till or Rip the Soil
Use a rototiller or ripper plow to deeply loosen compacted soil and allow for greater sod root penetration when laid.
Tilling across the grade rather than straight up and down helps stabilize the soil structure. But take care not to create furrows or overly loosen soil which increases erosion risks.
Grade and Shape the Slope
Define the exact shape, degree of angles, andmake adjustments to the slope’s grading to achieve proper drainage. Account for gravity by directing water flow appropriately around buildings, hardscapes, or low areas prone to pooling.
Ideally, maintain slope angles of no more than 20 degrees. A 2-5% gradient is optimal for balancing drainage capacity while remaining navigable for future mowing and maintenance.
Install Subsurface Drainage
On steeper hills or clay-heavy soils, incorporate French drains or perforated pipe systems about 12-18 inches under the surface to enhance drainage and reduce pooling or runoff. Proper drainage gives sod a better chance at thriving long-term.
Selecting The Right Sod Materials for Superior Performance on Slopes
When shopping for sod, look for grass species and varieties specifically cultivated for heat, drought, and wear tolerance. Prioritize deep rooting sod for maximum erosion resistance and strength on slopes.
These grass types offer excellent slope performance:
Cool Season Grasses
- Tall Fescue – Deep roots to 6 feet, drought tolerance
- Fine Fescue – Fine blades with extensive rooting to 5 foot depth
- Kentucky Bluegrass – Dense rhizome mats provide good anchorage
Warm Season Grasses
- Bermudagrass – Aggressive spreading growth habit with deep taproots
- Zoysia – Excellent mat of thick stolons and deep roots
- St. Augustine – Stolons cling to surface while roots penetrate deeply
Within these broader species, look for sub-varieties specifically bred for superior heat, drought, and wear tolerance needed on hills. Local sod farms and suppliers can guide you to the ideal turfgrass cultivars for your specific climate and conditions.
Avoid cheap sod filled with ryegrass, as this functions mainly as a nurse grass and lacks the longevity desired on slopes. Invest in premium quality, 100% improved turfgrass sod for best slope results.
Step-By-Step Game Plan for Proper Sod Installation on Slopes and Hills
With soil properly prepped and high-performance sod chosen, you’re ready for installation. Follow these key steps for flawlessly laying sod on steep hills and angles:
Start Laying Sod at the Bottom of the Slope
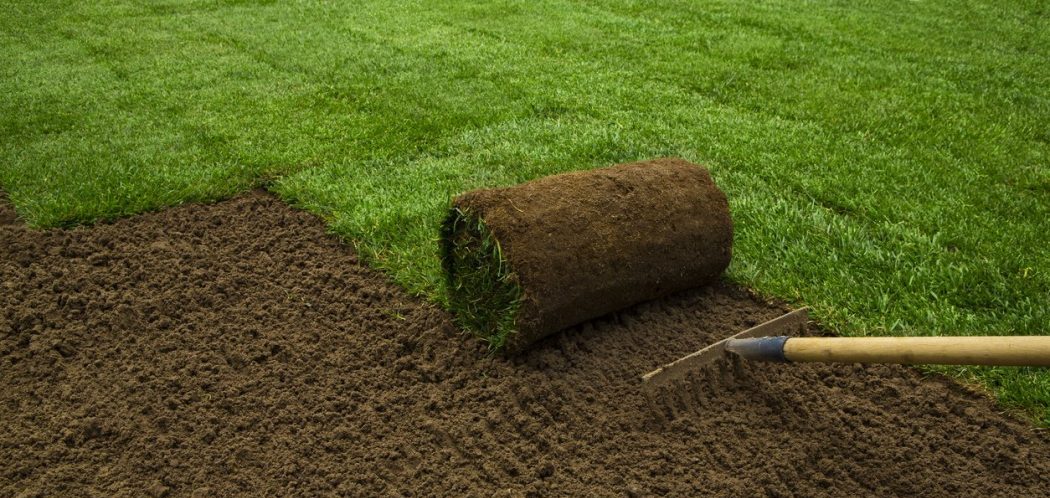
Always begin sod installation at the base or bottom of the slope and work upward. This prevents slippage and gaps by building the sod against gravity.
Stagger Seams in a Brickwork Pattern
Lay sod rows in an offset, brick-like arrangement similar to masonry walls rather than stacking seams vertically. Staggered joints increase strength and stability while minimizing erosion vulnerabilities.
Fit Pieces Tightly Without Gaps
Butt edges together snugly without overlapping or leaving gaps between pieces. No gaps means no weak points for soil erosion or weed intrusion between pieces.
Secure Edge Rows at Crest of Slope
Use landscaping pins, sod staples, or wooden stakes along the top row edges and periodic ally along mid-slope seams. This anchors the sod against slippage or peeling, especially on steeper pitches.
Work Quickly and in Cooler Temperatures
Perform installation in the early morning or later afternoon when temperatures are down to avoid stressing new sod. Work efficiently to minimize time between cuts and laying.
Water Lightly to Avoid Dislodging
Water newly laid sod gently but frequently, around 1/4 inch per session. Too much water volume can displace sod before roots take hold.
Proper ongoing care once installation is complete remains critical for sod health too…
Post-Installation Care and Maintenance for New Sod on Slopes
The first 2-4 weeks after laying sod on slopes require extra vigilance. Follow these best practices for ensuring new sod establishes strongly:
Water thoroughly but consistently – Soak to 6-inch depth but avoid heavy runoff. Upper slope areas may need more frequent sessions. Gradually taper watering as roots develop.
Let sod root before mowing – Wait 10-14 days until sod secures through rooting before mowing. Use light settings and mow across rather than up/down steep slopes.
Early fertilization – Look for phosphorous-rich, lower nitrogen fertilizers formulated to encourage rooting and establishment. Follow package application rates.
Weed patrol – Monitor for invasive grasses like crabgrass that can take advantage of any gaps or seams in new sod. Hand pull to avoid disrupting young roots.
Check for insects or disease – Catch issues early and treat with recommended insecticides or fungicides to prevent decline or die out.
Adjusting watering routines, delaying mowing, and attentive care in these first few weeks gives tender new sod the best shot at thriving long-term. Be patient – the extra diligence is well worth it!
Preventing and Troubleshooting Common Sod Issues on Sloping Ground
With careful installation and attentive follow-up care, sod success on slopes is very achievable. But it can still run into issues if preparation was subpar or maintenance neglected. Stay alert for these potential challenges:
Sod slippage or failure to root – Secure loose edges immediately with extra anchors. For unrooted sections, try re-laying with better soil contact or replace with new sod.
Sod drying or browning – Brown patches indicate inadequate moisture. Identify dry areas and adjust watering volume and frequency. Syringe browning sections to revive until roots establish.
Runoff and erosion – Use temporary silt barriers or trenches to redirect water flow. Long term, install drainage breaks and berms to capture runoff.
Weed intrusion – Aggressive weeds taking advantage of thin areas in sod. Overseed with quality grass seed to thicken up.
Don’t panic if issues do pop up – with quick response and remedies, you can still achieve slope sod success.
Other Planting Options for Slopes If Sod Isn’t Feasible
Sod remains the best solution for quickly establishing attractive, stable turfgrass on hills and slopes. But alternatives do exist if sod truly isn’t in the budget or practical for a site:
Hydroseeding – Hydraulically sprayed blend of grass seed, wood fiber mulch, and tackifier. More stable than overseeding but slower to establish than sod.
Groundcovers – Low-growing perennials like sedum, ivy, or creeping phlox that tolerate slopes. Best for rockier areas not suitable for turfgrass.
Native grasses – Warm season native bunchgrasses can work well on hot, sunny, low-maintenance slopes.
Tiered landscaping – Use retaining walls, boulders, or timbers to create flattened beds and multi-level slope terracing.
These options can succeed in certain scenarios not ideal for sod. But given the choice, quality sod properly laid remains the best solution for landscaped home slopes.
Conquer Hills with Confidence Using the Art and Science of Quality Sod
Don’t fear installing sod on slopes! While challenging, you can create a stunning, polished sod lawn on even significant hills and angles with the right planning and care. Focus on thorough site preparation, high-performance sod selection, proper laying technique, and attentive follow-up maintenance and you simply can’t go wrong.
The artistry comes in perfectly grading and fitting the sod for seamless transitions across the slope. The science lies in selecting ideal grass varieties and ensuring correct soil preparation and drainage. Combine both for flawless results.
Go into the process armed with this guide’s step-by-step best practices and you can master sodding slopes with confidence. Soon you’ll be enjoying an envy-worthy landscape that thrives beautifully on the hillside.
What tips or tricks have you learned from your own sod installation projects on slopes and hills? Please share your experiences or questions so we can keep the conversation growing to support more homeowners in getting their sloped yards looking fantastic!


